Beauty images look simple until color decisions become measurable. A warm foundation shade can shift under studio lamps, window light, or a phone screen. In 2026, creators need more than an attractive color picker. They need a repeatable method that respects lighting, skin-tone variation, and image quality.
This guide explains how to extract colors from beauty images using practical digital tools and careful visual checks. You will learn how to identify dominant palette colors, sample lipstick and eyeshadow tones, and record accurate hexadecimal or RGB values. It also covers cropping, white-balance correction, and color profiles. Small details matter. A reflected pink backdrop may change the apparent blush shade. Compression can soften a sharp contour color.
Reliable results begin with source control. Use the highest-quality image available, preserve the original file, and compare sampled colors against physical references when possible. Professional workflows often combine automated analysis with human review. Neither method is perfect. Algorithms may select background pixels, while personal judgment may favor a pleasing shade over a faithful one. That tension deserves attention.
We will also discuss accessibility, ethical image handling, and responsible interpretation. Extracted colors should support design, product planning, and visual research, not make unsupported claims about a person’s identity or complexion. Some results will remain approximate. That is normal. The goal is a transparent process that others can repeat, evaluate, and improve.
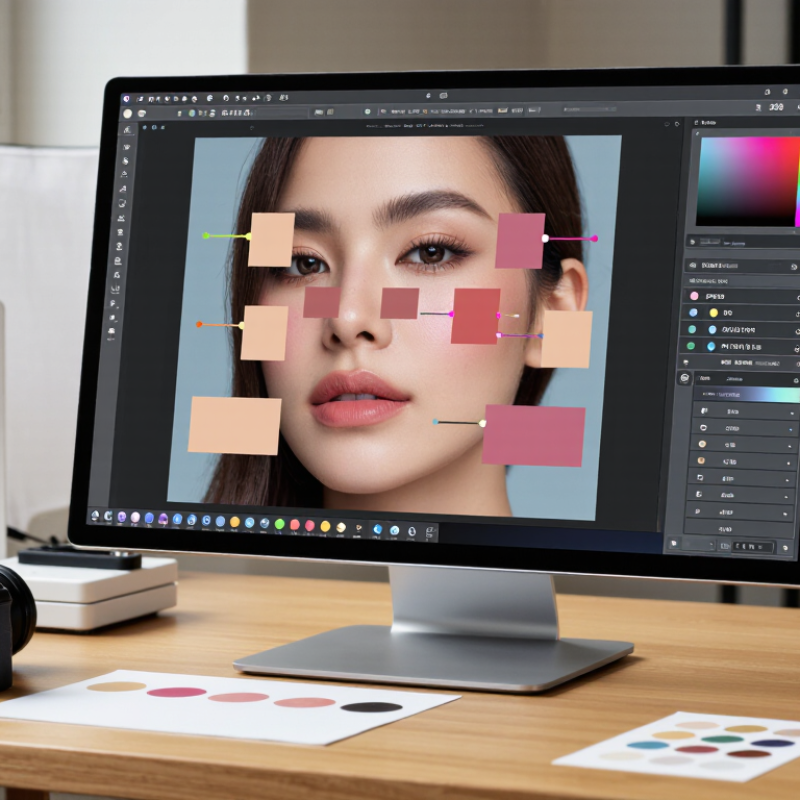
Understanding color extraction from beauty images in 2026 requires more than sampling the brightest pixels. Makeup, skin, hair, and background colors can shift under studio lamps, phone cameras, and screen settings. Light lies. I begin by checking image metadata, white balance, and exposure when those details are available. Then, I crop the face, lips, eyes, and product areas separately. This prevents a pale background from dominating the palette.
I usually compare RGB values with LAB color space, which better reflects human visual differences. A small cluster of pixels can represent a cheek blush, but skin texture may distort the result. I remove highlights and deep shadows before measuring dominant, supporting, and accent tones. A neutral gray reference helps, although many published beauty images lack one. In that case, I record the uncertainty instead of presenting an exact shade.
My first extraction often needs correction. Reflected light from a nearby curtain once made a nude tone appear noticeably pink. I now test samples across several facial regions and compare them under neutral viewing conditions. Each result should include the image source, crop location, color profile, and sampling method. This makes the process easier to audit and reproduce. Human review still matters, especially when subtle undertones affect cosmetic design, visual search, or inclusive shade analysis. Automation saves time, but it does not understand every complexion.
Accurate beauty color analysis begins before any pixel is measured. Capture images under steady, diffused light, preferably near 5000–5500K. Avoid mixed lighting from windows, lamps, and screens. Mixed light creates uneven skin tones.
Keep the camera sensor clean and shoot in RAW when possible. RAW files retain more color information than heavily compressed images. Place a neutral gray card beside the subject for white-balance correction. Check exposure on the cheeks, forehead, and lips, not only on the background. Glossy makeup can create bright highlights that hide the real shade. Slightly reduce glare through careful lighting, rather than aggressive editing.
Use a neutral backdrop and remove colored objects near the face. A green towel or red wall can reflect subtle tones onto the skin. After capture, correct white balance before adjusting saturation or contrast. Work in a consistent color space, such as sRGB, when images will be viewed online. Record the light source, camera settings, and editing changes for repeatable results. This habit supports reliable comparison across different images.
One mistake is easy to miss. Skin color changes across the face. A single cheek sample may not represent the whole complexion. Sample several balanced areas and exclude shadows, blush, freckles, and specular highlights. The process is not perfectly objective. Human judgment still affects every selection, so review uncertain results instead of forcing a precise answer.
Practical image-preparation benchmarks for more consistent beauty color extraction
| Preparation Dimension | Recommended Target | Why It Matters | Color-Analysis Risk if Ignored | Suggested Validation Metric | Practical Action |
|---|---|---|---|---|---|
| Image resolution | At least 1,000 pixels on the shorter edge | Preserves small regions such as lip edges, blush areas, and individual cosmetic particles. | Downsampling can blend adjacent skin, hair, and product colors. | Minimum dimension in pixels | Reject or resize images that are too small before segmentation. |
| File color space | Convert all files to sRGB before comparison | A common color space makes RGB values more comparable across images and software. | Embedded profiles or wide-gamut files may produce inconsistent color values. | Color-profile consistency rate: 100% | Read the embedded profile and convert rather than simply assigning sRGB. |
| Bit depth | 8-bit minimum; 16-bit preferred during editing | Higher precision helps retain subtle tonal differences during corrections. | Repeated adjustments may create banding or clipped color channels. | Clipped-channel percentage | Keep a high-bit-depth working copy and export a standardized analysis copy. |
| White balance | Neutral reference or calibrated gray target in the scene | Corrects shifts caused by warm, cool, or mixed illumination. | Skin, foundation, lipstick, and powder colors may all appear systematically warmer or cooler. | Neutral-patch RGB channel deviation | Use a neutral reference whenever capture conditions allow it. |
| Lighting uniformity | Avoid visible hotspots and strong directional shadows | Uniform illumination reduces brightness differences unrelated to the cosmetic color. | Highlights can desaturate colors, while shadows can make them appear darker and more saturated. | Luminance range across the analysis region | Crop or mask regions affected by glare and hard shadows. |
| Exposure control | Keep clipped pixels below 1% of the target region | Maintains highlight and shadow detail needed for reliable color measurement. | Clipping replaces real color information with pure white or black values. | Percentage of pixels at channel value 0 or 255 | Flag images with excessive clipping for retouching or recapture. |
| Specular highlights | Exclude reflective pixels from the color sample | Gloss, oils, and wet textures reflect the light source rather than the base material color. | A small number of bright pixels can distort the mean color substantially. | Highlight-mask coverage percentage | Use a highlight mask or a robust statistic such as the median. |
| Region of interest | Use a segmented mask for the intended cosmetic area | Separates the target color from skin, hair, background, and accessories. | Background pixels can shift the extracted palette and reduce relevance. | Intersection-over-union of the mask | Review mask boundaries around lips, eyelids, cheeks, and product edges. |
| Color representation | Analyze in CIE Lab or OKLab; retain RGB for export | Perceptual spaces separate lightness from chromatic components more usefully than raw RGB. | RGB distances do not correspond consistently to perceived color differences. | Mean and standard deviation of L*, a*, and b* | Convert from linearized sRGB using a documented transformation. |
| Sampling method | Use median or trimmed mean for textured regions | Robust statistics reduce the influence of glare, pores, particles, and isolated artifacts. | A simple mean may be pulled toward outlier pixels. | Median-to-mean color distance | Compare median, trimmed mean, and clustered colors before selecting one. |
| Compression control | Use lossless or high-quality source files | Preserves edges and reduces block artifacts in smooth gradients. | Compression can create false colors and contaminate small regions. | Compression level and artifact inspection | Avoid repeated export cycles and keep the original capture file. |
| Quality assurance | Duplicate review by image and color-analysis checks | Combines technical image validation with visual confirmation of the selected region. | Undetected lighting, masking, or profile errors can propagate through the full dataset. | Pass rate across all quality checks | Store preprocessing settings, masks, color space, and validation results with each image. |
Extracting colors from beauty images in 2026 requires more than selecting the brightest pixels. Lighting can shift a foundation shade from warm beige to dull orange. A reliable workflow starts with controlled lighting, neutral references, and consistent image metadata. I usually inspect exposure and white balance before choosing an extraction tool. Small errors here can distort every later measurement.
For simple projects, a color picker can sample lips, cheeks, hair, or packaging areas manually. Automated work needs segmentation, especially when skin overlaps with highlights or shadows. HSV helps separate vivid cosmetic tones, while Lab often supports more perceptual comparisons. Clustering algorithms can group repeated colors, but they may mistake reflections for makeup. I prefer combining face-region masks with k-means or histogram analysis, then checking results against the original image. Human review remains important.
Test samples under several lighting conditions. Keep a record of camera settings and editing steps. That makes the process more reproducible. Still, no algorithm is perfectly neutral. Skin tones vary across devices, complexions, and cultural contexts. My early tests sometimes overrepresented pale highlights. That was useful, but uncomfortable. It showed why balanced datasets and manual correction matter. A color value should describe the image, not pretend to define a person.
Selecting Tools and Algorithms for Beauty Color Extraction
This normalized reference palette represents the dominant color distribution commonly analyzed in beauty imagery. Skin tones usually occupy the largest pixel area, while lips, eyes, hair, background, and highlights provide additional color signals. For reliable extraction, convert images to a perceptual color space such as CIELAB or OKLab before clustering colors with k-means or a similar algorithm.
Sample skin from the cheek or forehead, not shiny highlights or deep shadows. Choose several points and calculate a middle value, because one pixel can mislead you. For makeup, isolate lipstick, blush, eyeshadow, or eyeliner with a selection mask. Record both the visible color and its finish, such as matte, satin, or reflective. Human skin is not one flat color.
Hair requires careful separation from the background. Sample mid-length strands, then check roots, highlights, and darker sections separately. For product colors, select the main surface away from glare, labels, and reflections. Convert samples into a consistent color space, such as sRGB or CIELAB, before comparing them. Calibrated displays improve reliability, yet screen results can still differ from printed materials. I also keep the image, lighting notes, sample coordinates, and editing settings for review. Some choices remain subjective, especially when makeup overlaps skin. That uncertainty should be recorded, not hidden.
Extracted colors from beauty images can look precise while hiding serious errors. Lighting changes everything. A warm bathroom lamp may shift beige toward yellow, while phone processing can deepen red tones. I validate each sample against the original image at normal viewing size. Then I inspect it under neutral lighting and on a calibrated display. When possible, I compare RGB values with CIELAB measurements and check the perceptual difference between samples.
My first pass was too confident. Similar blush tones formed separate groups because skin texture affected the pixels. I now remove highlights, shadows, and background areas before sampling. A small human review still matters. Automated extraction notices patterns, but it may mistake gloss for pigment. I keep questionable colors instead of forcing them into clean categories. That choice feels less elegant, but it protects later decisions.
For practical use, I organize colors by function, temperature, depth, and confidence level. Each record includes the source image, crop location, lighting condition, color values, and review date. Clear names help, but names can mislead. “Soft rose” may mean different things to different teams, so numerical values remain the authority. I also store a tolerance range rather than one absolute value. Keep the uncertainty. Color libraries change as images, screens, and reviewers change. Regular rechecking keeps the collection useful, traceable, and honest.
Bright pixels often come from gloss, studio lamps, or reflective skin. They may not show the actual makeup color. Light lies.
Use steady, diffused light around 5000–5500K. Avoid windows, lamps, and screens illuminating the subject together. Mixed light causes uneven skin tones.
Crop the cheeks, lips, eyes, and product areas separately. This prevents a pale background from controlling the entire color palette.
Compare RGB values with LAB color space when possible. LAB better represents visible differences between nearby shades. Online results can use sRGB consistently.
Place a neutral gray card beside the subject. Check exposure on the cheeks, forehead, and lips. Keep colored towels and walls away from the face.
Exclude glossy highlights and deep shadows before measuring tones. Careful lighting is better than heavy editing. Aggressive correction can change the shade.
Usually, no. Skin color varies across the face. Sample several balanced areas, excluding blush, freckles, shadows, and bright reflections.
Record the image source, crop location, color profile, lighting, camera settings, and sampling method. These details make comparison easier to repeat and review.
No. Automation saves time, but human choices still affect sampling. My first extraction can be wrong. Record uncertainty instead of forcing an exact shade.
This guide explains how to extract colors from beauty images in 2026 with a practical, structured workflow. It begins by clarifying the goals of color analysis, such as identifying skin tones, makeup shades, hair colors, or product hues. Before processing, images should be prepared through consistent lighting, suitable resolution, background cleanup, and careful cropping to reduce shadows, reflections, and visual distractions. These steps help create more reliable and comparable color results.
The article then introduces ways to choose appropriate tools and algorithms, including color-space conversion, sampling methods, clustering, and region-based analysis. It describes how to isolate and extract colors from skin, makeup, hair, and beauty products step by step. Finally, the extracted colors are validated against the original image, refined when necessary, and organized with clear labels, values, and usage notes. This approach makes the results easier to compare, reuse, and apply in future beauty-related visual projects.
